I once waited weeks for a prototype, only to receive a bag with sagging handles because I missed a single internal reinforcement callout.
Factories do not guess; they execute exactly what you write. If you fail to define specifics like Stitches Per Inch (SPI) or edge paint formulas, manufacturers often default to the cheapest method available.
A professional handbag tech pack example acts as your binding agreement. It prevents costly sampling rounds and eliminates the “ambiguity markup” factories add to protect their margins against vague designs.
Below, I break down the exact PDF-ready layout used for production—covering technical drawings, Bill of Materials (BOM), and standard dimensional tolerances (industry standard is typically ±5 mm for soft goods).
Whether you are an independent designer or scaling operations, this structure turns your sketch into a factory-ready file.
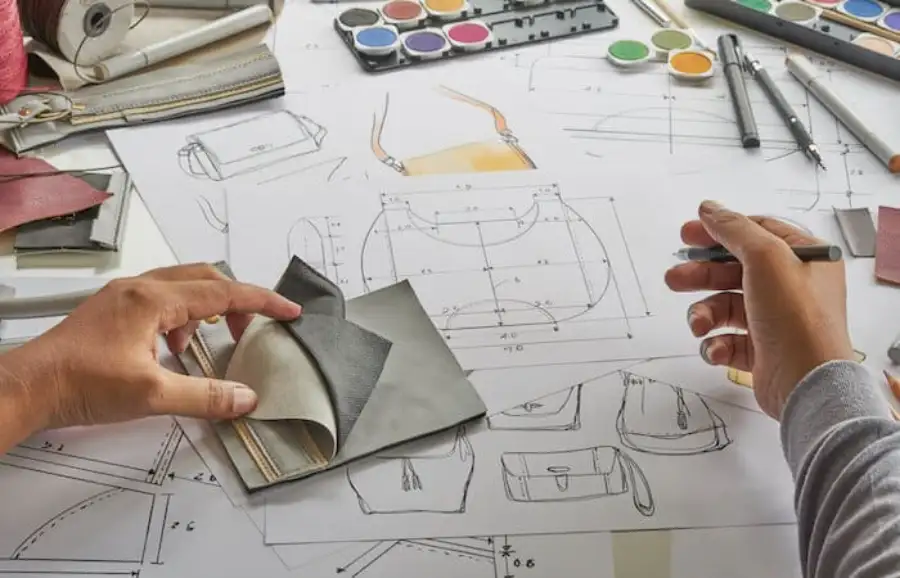
Table of Contents
What You Need Before You Start

In my experience, most sampling delays happen because the factory has to guess missing details. Before you start drafting, gather these inputs to ensure we can quote accurately without weeks of email back-and-forth.
- The Software: I use Adobe Illustrator for vector flats and Excel or Google Sheets for the Bill of Materials (BOM). If you manage 50+ SKUs, PLM software is better for version control, but spreadsheets work for 90% of brands.
- File Bundle: Create this exact folder structure to keep sharing painless and make collaboration smooth throughout the handbag design process:
- Flats (AI/PDF source files)
- Spec-Sheet (Dimensions)
- BOM (Material lists)
- Artwork (Logos/Hardware)
- References (Competitor photos)
- Hard Decisions:
- Target FOB Cost: Set a strict price ceiling. If your business model requires a $20 unit cost, we can’t spec premium full-grain leather.
- Tolerances: Standard is ±5 mm for soft goods. Tighten this to ±1 mm for hardware attachment points.
- Use Case: Define the load. A daily laptop tote needs different reinforcement than an evening clutch.
- Material Prep: Ship physical swatches if possible. If digital, reference specific handbag material types.
- Safety Targets: Identify your market’s “hard stops” immediately (e.g., REACH for EU, Prop 65 for CA, CPSIA for kids).
🧠 Expert Take: Always specify your testing standards in the tech pack. I recommend citing official ISO/ASTM test methods for leather and hardware performance. This prevents disputes later if materials fail compliance testing.
Step 1: Build the “Source of Truth” Skeleton

Factory errors often stem from version mismatches on loose pages. Whether you use Excel, Illustrator, or a PLM, you must build a rigid document structure before drawing a single stitch.
1. Create a Universal Header Place a Cover Block in the top-right corner of every page. I found that if a page gets detached on the factory floor, this block is the only thing linking it back to the correct order. Include:
- Style Name & Code (e.g., LLB-Tote-001)
- Version (Start at v0.1; never label it “Final”)
- Date & Designer Name
- Units (Standardize to mm for precision)
2. Define Global Tolerances On Page 1, set explicit margins to prevent the factory from assuming a standard ±1cm variance. I strictly define General Seams at ±5mm and Logo/Hardware at ±1mm for tighter control.
3. Set the Page Hierarchy Organize pages so the sewing team can scan them fast:
- Technical Flats (Visual overview)
- Measurements Table (The math)
- Construction (Interfacing and reinforcement)
- BOM (Materials and hardware)
- Branding, QA, & Packaging
4. Enforce Logic & Accessibility Add a Source of Truth rule: “If the Measurement Table conflicts with a drawing, the Table wins.” Additionally, label parts by number (e.g., “Panel 1”) rather than just color to ensure clarity for workers with color vision deficiencies.
Step 2: Produce the Technical Drawings (Flats)

Factories cannot build from 3D renders. You must create high-contrast, black-and-white 2D flats using Adobe Illustrator or a precise CAD export to show exactly how pieces fit. Focus on orthographic clarity—no shading or perspective.
1. Draw Essential Views Create Front, Back, Side, and Interior views. If your design includes feet or base reinforcement, add a Bottom View. Use thick solid lines for cut edges and thin dashed lines for stitching paths to distinguish construction methods.
2. Add an Exploded View For layered items like a custom crossbody bag, draw the assembly exploded. I separate the Shell, Foam, Board, and Lining into floating layers so the sample room sees exactly where hidden stiffeners must sit.
3. Annotate Construction Details Add specific callouts for every finish. Avoid vague pointers; describe the method:
- Stitching: Define the stitch type and Stitches Per Inch (SPI). In my tests, specifying “8–10 SPI” prevents the factory from using rapid, loose stitching.
- Edge Finish: Specify the system, such as Turned Edge or Raw Edge. Note the paint type (e.g., water-based vs. solvent-based) and layer count.
- Hardware: Use dimensional lines to mark rivet counts and slider positions (e.g., “D-ring: 25mm from seam”).
4. Map Your Components Number every piece (e.g., P1 Body Front, P2 Gusset) and create a Legend mapping numbers to names. This reduces translation errors during pattern making.
⚠️ Experience Warning: The “A4 Print” Test always print your drawing on standard paper before sending it, just like you would for a handbag tech pack example. On a monitor, 0.5pt stitch lines look clear, but I found they often print as solid black blocks in factory offices. Ensure your stitch dashes are spaced widely and text callouts do not overlap so they remain readable on low-quality prints, especially when sharing a handbag tech pack example for production reference.
Step 3: Define Critical Dimensions (The POM Table)
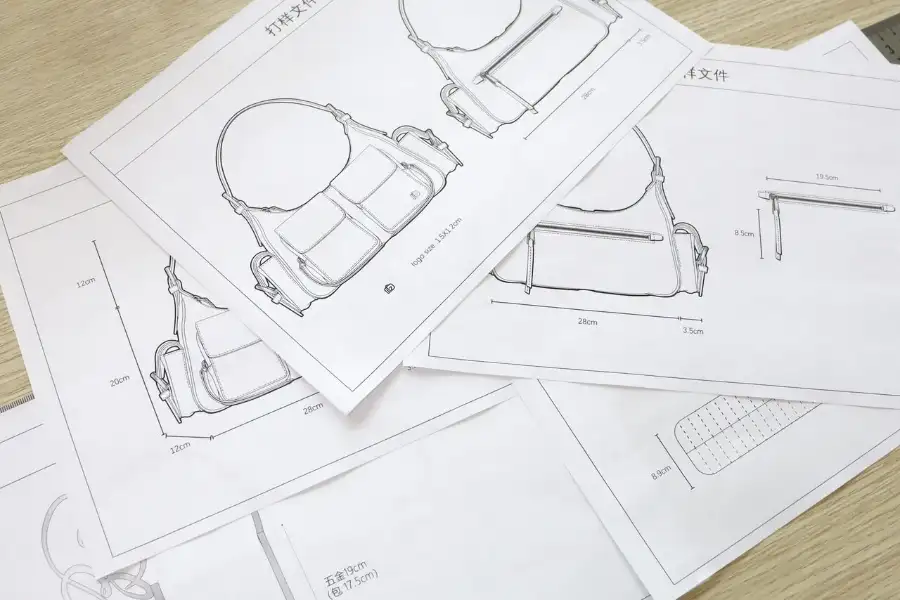
Vague measurements cause production rejections. You must define exactly where the tape measure lands to ensure repeatability across thousands of units.
1. Build the Measurement Table Create a table in your spec sheet with these columns: Callout ID, Point of Measure (POM), Target Spec (mm), Tolerance, Sample Actual, and Pass/Fail. This structure forces the factory to record their internal QC data directly against your specs.
2. List Essential POMs Standardize these points for every handbag tech pack example:
- Body: Top Width, Bottom Width, Height, and Depth/Gusset.
- Details: Zipper length, Pocket size, and Logo placement (X/Y coordinates).
- Handle Drop: Define the measurement state. I always specify Handle Drop (Under 2kg Load) rather than Relaxed. Leather stretches under weight, and “relaxed” specs often result in totes that drag on the ground when in use.
3. Map Arrows on Technical Flats Draw red arrows on your flats showing exact start and end points. Explicitly note if the measurement tracks the Finished Edge or the Seam Line. Use descriptive labels like Top Opening Width rather than cryptic codes like “A-to-B” to prevent translation errors.
4. Set Logic-Based Tolerances Do not use a blanket rule. For soft, relaxed silhouettes, I typically allow ±10mm. However, for rigid panels or hardware placement, you must tighten the tolerance to ±2mm.
🧠 Experience Check: The “Two-Person” Rule Before finalizing, hand your tech pack and a physical sample to a colleague. Ask them to measure the Top Width without your help. If their result differs from yours by more than the tolerance, your definition is unclear. If you cannot repeat the result, the factory won’t be able to either. Reference: Consult ASTM D3774 for standard textile measurement practices.
Step 4: Build the Bill of Materials (BOM)
Your BOM is both a build instruction and a price lock. In my experience, if a component is missing from this list, the factory will substitute it with cheaper generic stock.
1. Create the Master Table Open your spreadsheet. Set up these exact columns to prevent ambiguity: Item ID, Category (Shell/Hardware/Packaging), Description, Spec (Thickness/GSM), Color, Supplier Code, MOQ, and Unit Cost.
2. Define Materials and “Invisible” Internals Do not simply write “Leather.” Specify: “Pebbled Cowhide, 1.2–1.4mm, Pantone 19-4005 TCX.” Consult our material types guide for standard thicknesses. Next, add rows for the internal structure. You must explicitly list:
- Reinforcements: 0.8mm Salpa board for base stiffness.
- Fillers: EVA foam for body volume.
- Stabilizers: Non-woven interlining (100 GSM) for panels.
3. Lock Down Hardware & Finishes Define the exact Plating Code (e.g., Gunmetal or Shiny Nickel) and corrosion requirements. For zippers, specify the brand (e.g., YKK #5 Excella), tape width, and tooth polish. If using handbag edge paint, list the specific brand and formula number as a separate line item.
4. Set Thread & Yield Allowances Define thread type (e.g., Bonded Nylon 6.6) and SPI (Stitches Per Inch). Finally, add a column for Cutting Loss. Leather hides have natural defects, often resulting in 15–20% waste. I found that stating this allowance upfront prevents “surprise” material surcharges on the final invoice.
🧠 Author’s Verdict: The “Touch Test” Lay a reference sample on your desk. Touch every surface, inside and out—from the zipper tape to the hidden glue. If you can touch it, it must have a row in your BOM. If the row is missing, you are not ready to send the pack.
Step 5: Detail the Construction & Assembly Map
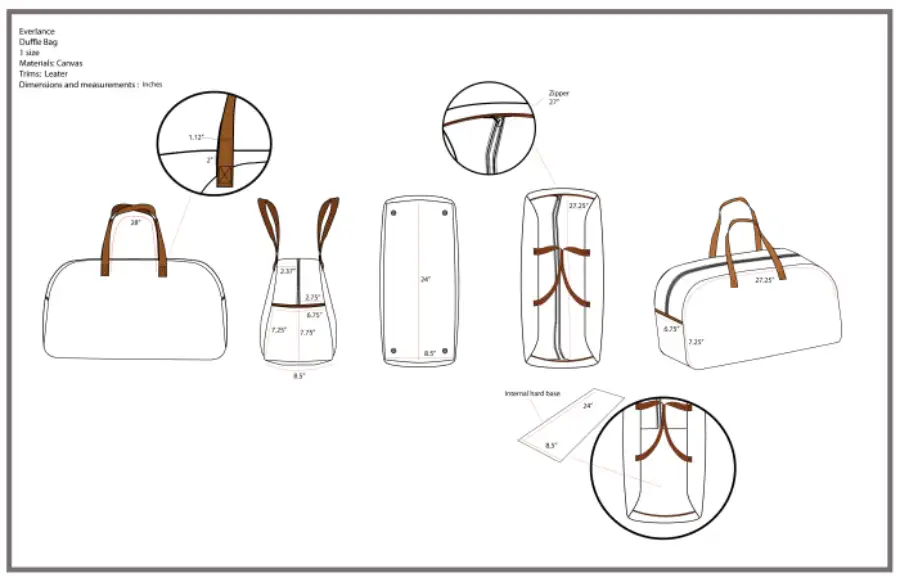
A technical drawing shows shape, but the construction page determines structural integrity. In my experience, if you leave the internal build ambiguous, factories default to the fastest method rather than the strongest.
1. Create a Linear Assembly Flowchart Do not let the factory guess the order. List this exact sequence in your notes to prevent shortcuts: Panel Prep > Reinforcement Lamination > Pocket Build > Zipper Set > Lining Assembly > Shell Assembly > Handle Attachment > Edge Finishing.
2. Map Hidden Reinforcements Create a dedicated view for invisible stiffeners. Label every zone by Component ID (e.g., “Apply 0.8mm Salpa to Panel F-01“) rather than vaguely shading a “dark area.”
- Critical Action: Call out EVA foam or Salpa board at every stress point: handle anchors, D-ring tabs, and zipper ends.
- Observation: I have seen dozens of prototypes fail due to handle sagging. This almost always happens because the reinforcement stopped 1cm short of the anchor point.
3. Define Stitch Mechanics Specify the Stitches Per Inch (SPI). Set this to 8–10 SPI for structural leather seams. Explicitly mark Backtacks (reverse stitching) at all strap insertion points to prevent tear-outs under load.
4. Mandate Edge Chemistry Define the finishing formula to avoid peeling. List the specific chemistry sequence: Primer > Base Coat > Sanding > Top Coat.
- Note: Specify a 24-hour cure time between coats. If you omit this, the factory may rush the drying process, leading to tacky edges that crack when bent.
5. Hardware & Sensory Verification Require Washers or backing plates behind every rivet. Without them, the metal cap will eventually tear through the leather skin.
- Sensory Check: When the sample arrives, run your thumb over the edge paint. It should feel glass-smooth without “pinholes” or waves. Squeeze the base panel; it should feel rigid with zero collapse.
Step 6: Specify Branding, Hardware & Labeling
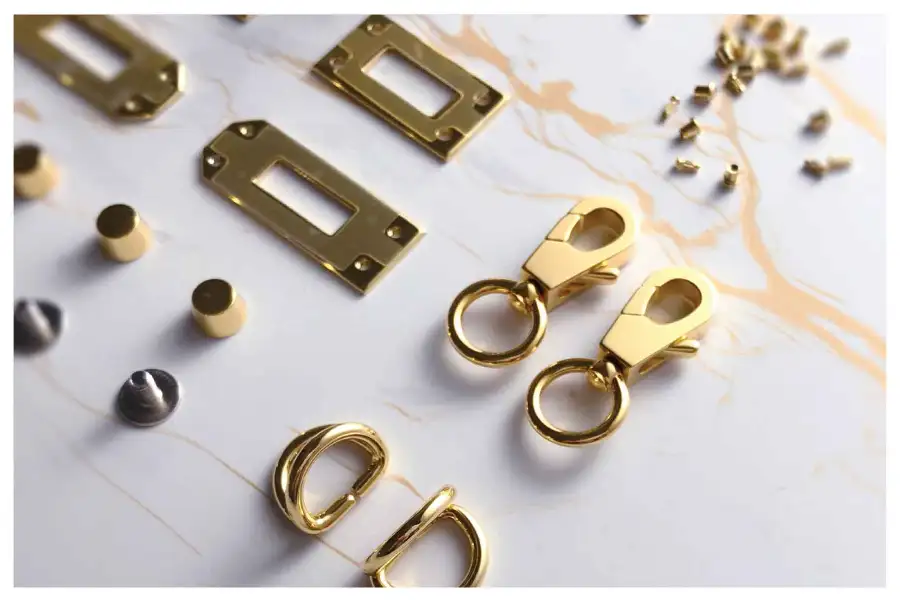
Factories cannot guess your brand identity. You must translate logos and legal requirements into mathematical coordinates on a dedicated Branding Page.
- Map placement coordinates. Define logo position using X/Y measurements from a fixed seam (e.g., “50mm down from Top Seam”), not “visual center.” In my experience, manual centering often drifts during mass production; fixed coordinates force consistency.
- Submit production files. Provide Vector Artwork (.AI) for mold creation and a Low-Res PNG for quick visual reference on the assembly line.
- Define application & hardware. Specify the method (e.g., Blind Deboss at 0.5mm depth). If using metal plates, instruct your custom handbag manufacturer to create a recessed cavity so the hardware sits flush.
- Add legal compliance. Include a Compliance Block detailing Country of Origin and Fiber Content.
🧠 Author’s Verdict: The Sensory Check When the sample arrives, close your eyes and rub the logo. A Deboss must feel crisp, not mushy. Foil edges should be sharp. Plates must not rock. If it feels cheap to your thumb, the customer will reject it.
Step 7: Define Quality Assurance & Packaging
Factories prioritize speed. Use your QC page in a handbag tech pack example to enforce standards before production begins. I have seen entire shipments rejected because a designer vaguely asked for “durable hardware” instead of specifying a 24-hour Salt Spray Test, which is why clear testing requirements are essential in any strong handbag tech pack example.
1. Mandate Measurable Testing
Insert a Testing Requirements Matrix citing international standards. This signals to best handbag manufacturers in China that you will verify durability with lab data, not just visual inspection.
| Component | Test Method | Pass Requirement |
|---|---|---|
| Hardware | ASTM B117 (Salt Spray) | 24 hours (Fashion) / 48 hours (High-Humidity) |
| Zipper | ASTM D2061 | Smooth run after 500 reciprocating cycles |
| Straps | Static Load Test | 10kg suspended for 4 hours with <5% elongation |
| Leather | ISO 11640 | No color transfer to white cloth (Dry/Wet Rub) |
2. Set Visual Acceptance Criteria
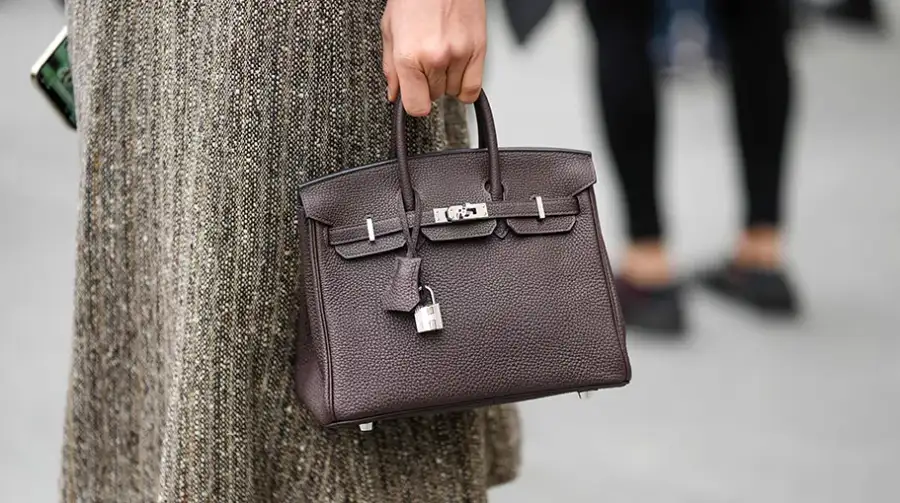
Lab tests take time; floor inspections happen instantly. List specific “Fail” triggers for the finishing team:
- Hardware: No sharp burrs, blistering, or “orange peel” plating.
- Construction: No skipped stitches or glue residue.
- Function: Zippers must not snag at corner curves.
- Finishing: Edge paint must not crack after a 180-degree bend.
3. Specify Packaging Architecture

Poor packing causes permanent leather creasing. Do not let the factory decide this.
- Stuffing: Mandate Acid-free Tissue Paper, stuffed firmly to maintain shape.
- Protection: Place bag in a 0.04mm Polybag inside a generic Dust Bag.
- Safety: Bold the requirement for a Suffocation Warning on all polybags for Amazon/FBA compliance.
- Carton: Require Double-Wall Corrugated Cardboard with internal dividers to prevent crushing.
Step 8: Build the Costing Sheet & Execute Handoff
A Tech Pack tells the factory how to build the bag; a Costing Sheet protects your margin.
- Draft a reverse-engineered cost sheet. Create a spreadsheet with lines for Material Subtotals (from your BOM), Hardware, Labor, and Packaging.
- Cost Levers: I found that hardware plating tiers and edge paint complexity are the massive swing factors. If the quote comes back high, adjust these specs first.
- Yield: Always add a 15% waste allowance for leather. Factories charge for the whole hide, including the scars they must work around.
- Lock down IP & Version Control.
- Legal: Sign a mutual manufacturing NDA before sharing editable source files.
- Naming: Never name a file “Final.” Use a tracked format like Style_v1.2_Date. I use revision clouds (red circles) to physically highlight changes from previous drafts.
- Protection: Add a diagonal “QUOTATION ONLY” watermark on every page.
- Send a “One-Packet” Master File. Merge your Tech Pack, BOM, and artwork into a Single Master PDF. Sending multiple attachments increases the risk of lost files. This unity is critical whether you source from local workshops or ladies handbags manufacturers in Pakistan.
⚠️ Experience Warning: The “Silence” Red Flag If you send a 20-page tech pack and the factory quotes immediately without asking a single clarification question, pause. Professional factories always ask about conflicting tolerances or material sources. Silence usually means they are guessing your requirements.
Frequently Asked Questions about Handbag Tech Pack Example
Do I really need a tech pack for a simple tote bag?
Yes. Even a “simple” tote has hidden variables: handle drop length under load, internal base reinforcement, and edge paint chemistry.
My Experience: I once skipped a handbag tech pack example for a basic canvas shopper, assuming the factory knew standard dimensions. They delivered 500 units with handles so short the bag couldn’t fit over a shoulder. Without a detailed tech pack — like the ones shown in a complete handbag tech pack example — specifying a “26cm drop,” I had no grounds to demand a refund.
Can I use Canva or Photoshop to make my tech pack?
No. You need vector-based software like Adobe Illustrator. Photoshop uses pixels, which blur when a factory zooms in to see stitch details. Canva lacks the measurement tools required for precise scaling. T
he Verdict: In our testing, Photoshop files often resulted in “interpretation errors” regarding seam allowances. Illustrator allows us to draw a 1mm line that remains exactly 1mm at any zoom level.
How do I protect my design from being copied?
Ownership lies in the details. A vague sketch is easy to copy; a fully engineered tech pack with unique construction methods is harder to replicate without your specific files.
My Take: While an NDA is legal protection, your best defense is complexity. When I specify a unique internal reinforcement structure or a custom hardware mold in the BOM, it becomes much harder for a factory to sell “your” bag to another client, as it requires specific tooling they don’t have on hand.
What is the difference between a Spec Sheet and a Tech Pack?
A Spec Sheet is just measurements; a Tech Pack is the manual. A Spec Sheet tells the factory what size to make it. A Tech Pack tells them how to build it, including materials, assembly order, and testing standards.
Real-World Context: We often see clients submit a Spec Sheet listing “Leather, 30cm width.” The factory uses cheap scrap leather and glue construction. A Tech Pack would have specified “Full-grain cowhide, stitched construction, 8 SPI,” preventing the quality drop.
Conclusion
You now possess a complete manufacturing blueprint.
This document is no longer just a sketch; it is a binding contract. By defining every stitch, reinforcement, and material tolerance, you have removed the factory’s ability to guess—and their ability to overcharge you for “ambiguity.”
Your Immediate Next Steps:
- Shortlist Manufacturers: Send this pack to 2–3 qualified factories. Do not just look for the lowest price; look for who asks the smartest questions about your specs. (See our guide on China sourcing for vetting tips).
- Request a Quote: Ask for a breakdown of mold costs, sample fees, and lead times. A professional custom handbag manufacturer will respect the detail in your pack and quote accurately.
- Start Sampling: Plan for 2–3 rounds of prototypes. Use your BOM and Measurement Table to check every millimeter of the first sample.
We build bags for brands that demand precision. If you are ready to turn this tech pack into a physical product, contact us today to start your sampling process.
Author’s Final Take: If it’s in the tech pack, it’s buildable—and inspectable. If it’s only in your head, it’s just a suggestion. Trust the document.